Nike Air Max 270 Commercial
This is one of the bigger project I've been worked on for a while. The goal was to make a product commercial in 3D to showcase all its features. And, Nike AM 270 was perfect for that. This is first time I worked with a couple of tools which was very exciting to learn. I tried to use a different workflow to visualize each feature so that each sequence feels unique. I used Redshift for the final rendering and After Effects for Call out assets and post production.
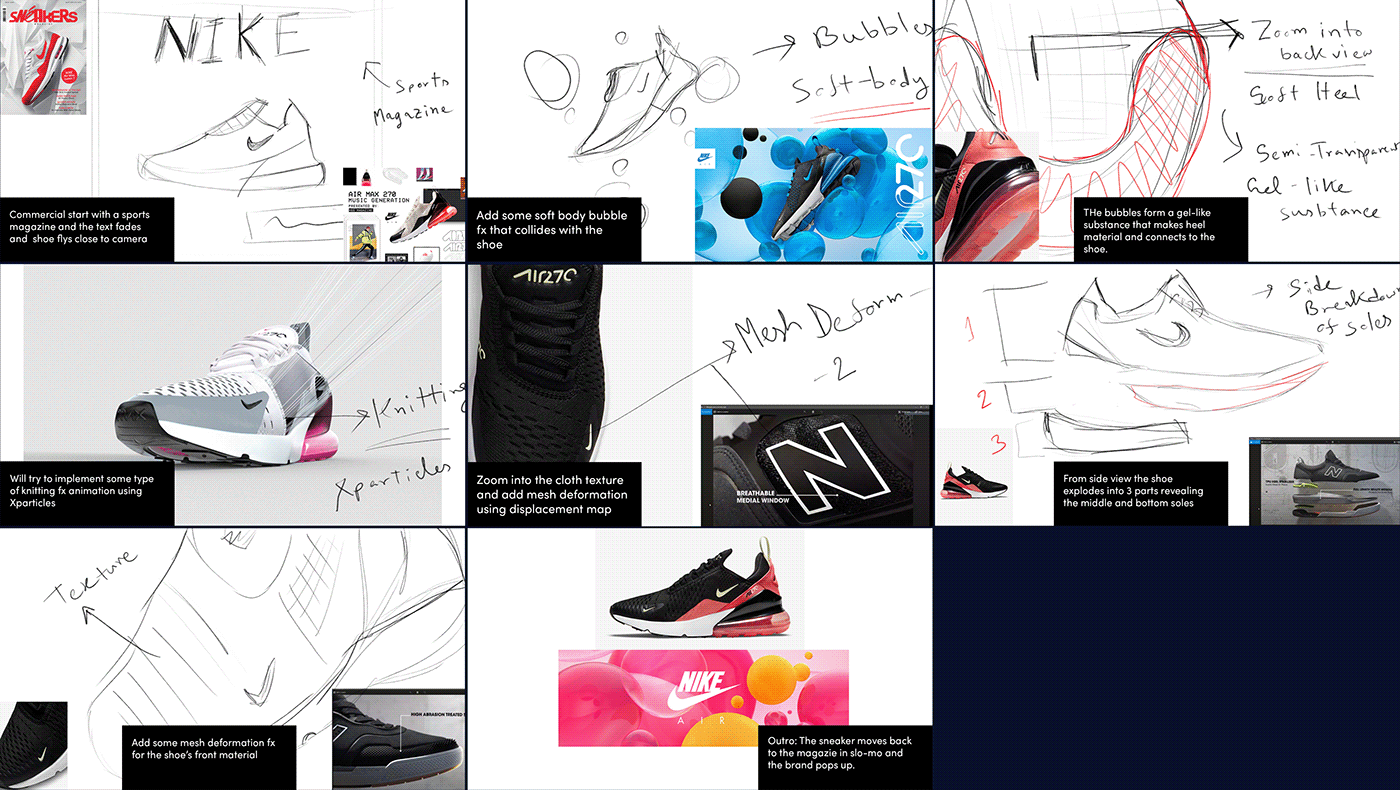
Storyboard:
I blocked out each sequences from reference renders. This helped me with understanding the scene-setup and fx required.

Lighting Setup:
I used traditional product lighting setup with the combination of key and fill lights. Used 1 curved plane that can work as Floor and back-plate to bounce some of the lights.
Shot Breakdown:
For the ‘Breathable Rubber’ sequence, I used ‘Mesh-tools’. It has an ‘mtInset’ function which generates a procedural inset (inner extrude) to each face of the mesh. Which then can be easily used for surface displacement. It’s a very fun to play with and I’ll definitely go deep on my next projects.
‘Sole bending’ sequence was a bit tricky for me. At first, I used the bend deformer on the shoe model but it didn’t achieve the result I was looking for. Also, the model didn’t come with a Mid-sole. So, I decided to model and texture one separately. Then, rig the shoe using IK joints so that it can be animated like a human foot. I also wanted to showcase the softness of the sole by adding toe-prints at the end. To achieve that effect, I used Maya’s Blend-shape function. Similar can be done using Cinema 4d’s Pose Morph.
For the 'Knitting' Animation, I took the help of ‘X-Particles’. Connected two ‘Xp-trail’ emitters to a wavy plane so that each can produce separate black and white lines of threads. Then, tweaked the settings of the Emitters so that it comes close to the pattern of the fabric.
For the Outro 'AIR logo' animation, I imported the vector logo to Cinema 4d. Then, connected the 3D model to a matrix with Thinking Particles. To move those particles around the surface, I converted the mesh using volume builder and added a field force. After that, I added a tracer, so that each particle can leave a trail behind. Lastly, added and animated multiple Spherical fields to control which part of the model produce particles.
Thank you!